If you want to work with capacitive touch sensing in AIR LAB, we have several MPR121 modules available for Arduino. This is a tutorial of how to get started with the very basics of capacitive touch sensing. This includes how to establish electrodes as toggles, buttons, and proximity sensors via the MPR121 library, published by Bare Conductive. At the very bottom of this page, we have gathered useful documentation to help you get further with capacitive touch sensing if needed.
What is capacitive touch sensing?
Capacitive touch sensing, is at its very core a constant measure of the change in the conductivity of a circuit. This change can be due to you touching, and thus becoming a part of, the circuit – or if the circuit has a large enough surface area – nearly by your presence. This is due to the dielectric properties of the human body on the surrounding atmosphere.
Anyway… You don’t really need to understand all that to make capacitive touch sensing work. You just need this tutorial, a MPR121 and an Arduino Uno.
What is an MPR212?
The MPR121 is a capacitive touch sensing module. It has built in I2C and an integrated circuit to help with the stability of your measurements. The module allows you to have 12 different electrodes connected to your Arduino. These electrodes are what can become buttons, toggle etc. So, one of these modules can make 12 buttons – pretty efficient!
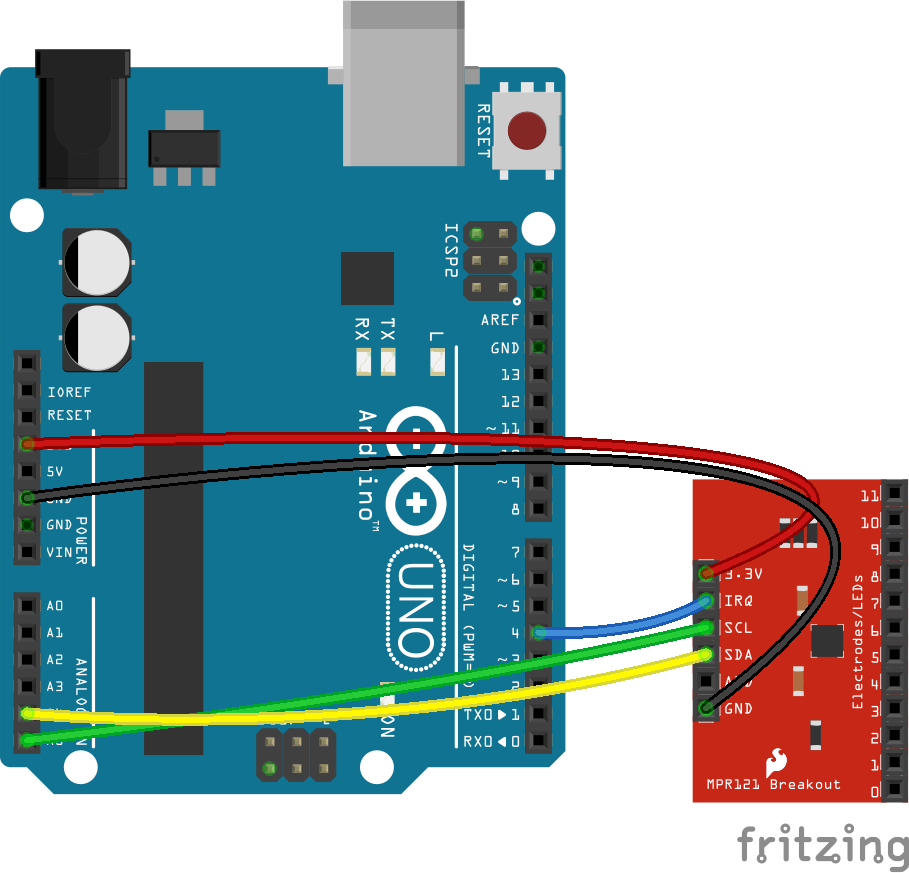
The MPR121 uses 3.3V, and needs ground, an interrupt pin (IRQ), a serial pin (SCL) and an SDA pin. You can look at the diagram below to see how it should be connected to your Arduino Uno. Next, we are going to learn a bit about the MPR121 library by Bare Conductive.
Introduction to the MPR121 library by Bare Conductive
When working with capacitive touch sensing, we suggest you use the MPR121 library made by Bare Conductive for Arduino. Why? We think it is quite powerful, and very easy to use – which makes it perfect for sketching purposes.
But before we get into that let’s start off by downloading some stuff…
- The Bare Conductive library on Github
- Guide for importing a .zip library into the Arduino IDE
- Download our example code here
Coolio. To get started, you need to initialize the MPR121 library, and setup the communication with the Arduino. You can read how that works via the example code provided above – if you really want to know. Otherwise, let’s look at what the library offers!
One of the cool parts of this library, is that it has built in functions for figuring out when a pin has been touched our released. These functions return either true or false, when provided with the number of the electrode you want to check. This means they’re perfect as conditions for if statements, which can trigger whatever you might like, when the electrode is touched – or released.

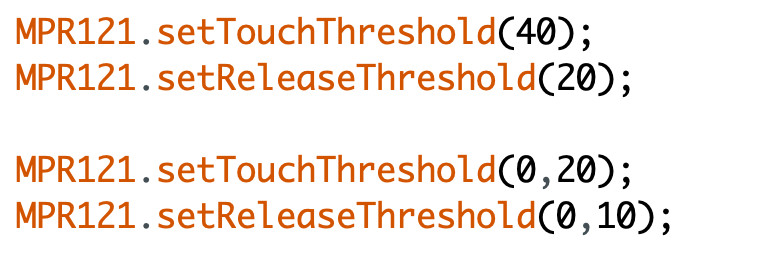
Another nice part of the library is that it is very easy to set the sensitivity of the electrodes. Higher values equal less sensitive readings. The default values are seen in the top of the picture below. In this picture, you might also notice there is a different way of setting the electrode – and this is where the library gets quite useful. You can set the sensitivity separately for all 12 electrodes! Here you see electrode 0 being made more sensitive – this might be useful in cases where an electrode doesn’t seem to be quite responsive enough. If you change the thresholds yourself keep in mind that the touch threshold must always be higher than the release threshold.
The library also allows you to use the raw measurements from the MPR121 – this is what we use when doing proximity sensing. These functions return the measurement from a specific electrode. Every electrode has two measurements. The baseline and the filtered data. The filtered data is the live measurements of the electrode’s capacitance, whereas the baseline is the natural capacitance of the electrode… you know… when you aren’t near it…

Neat, now let’s build stuff.
Our example
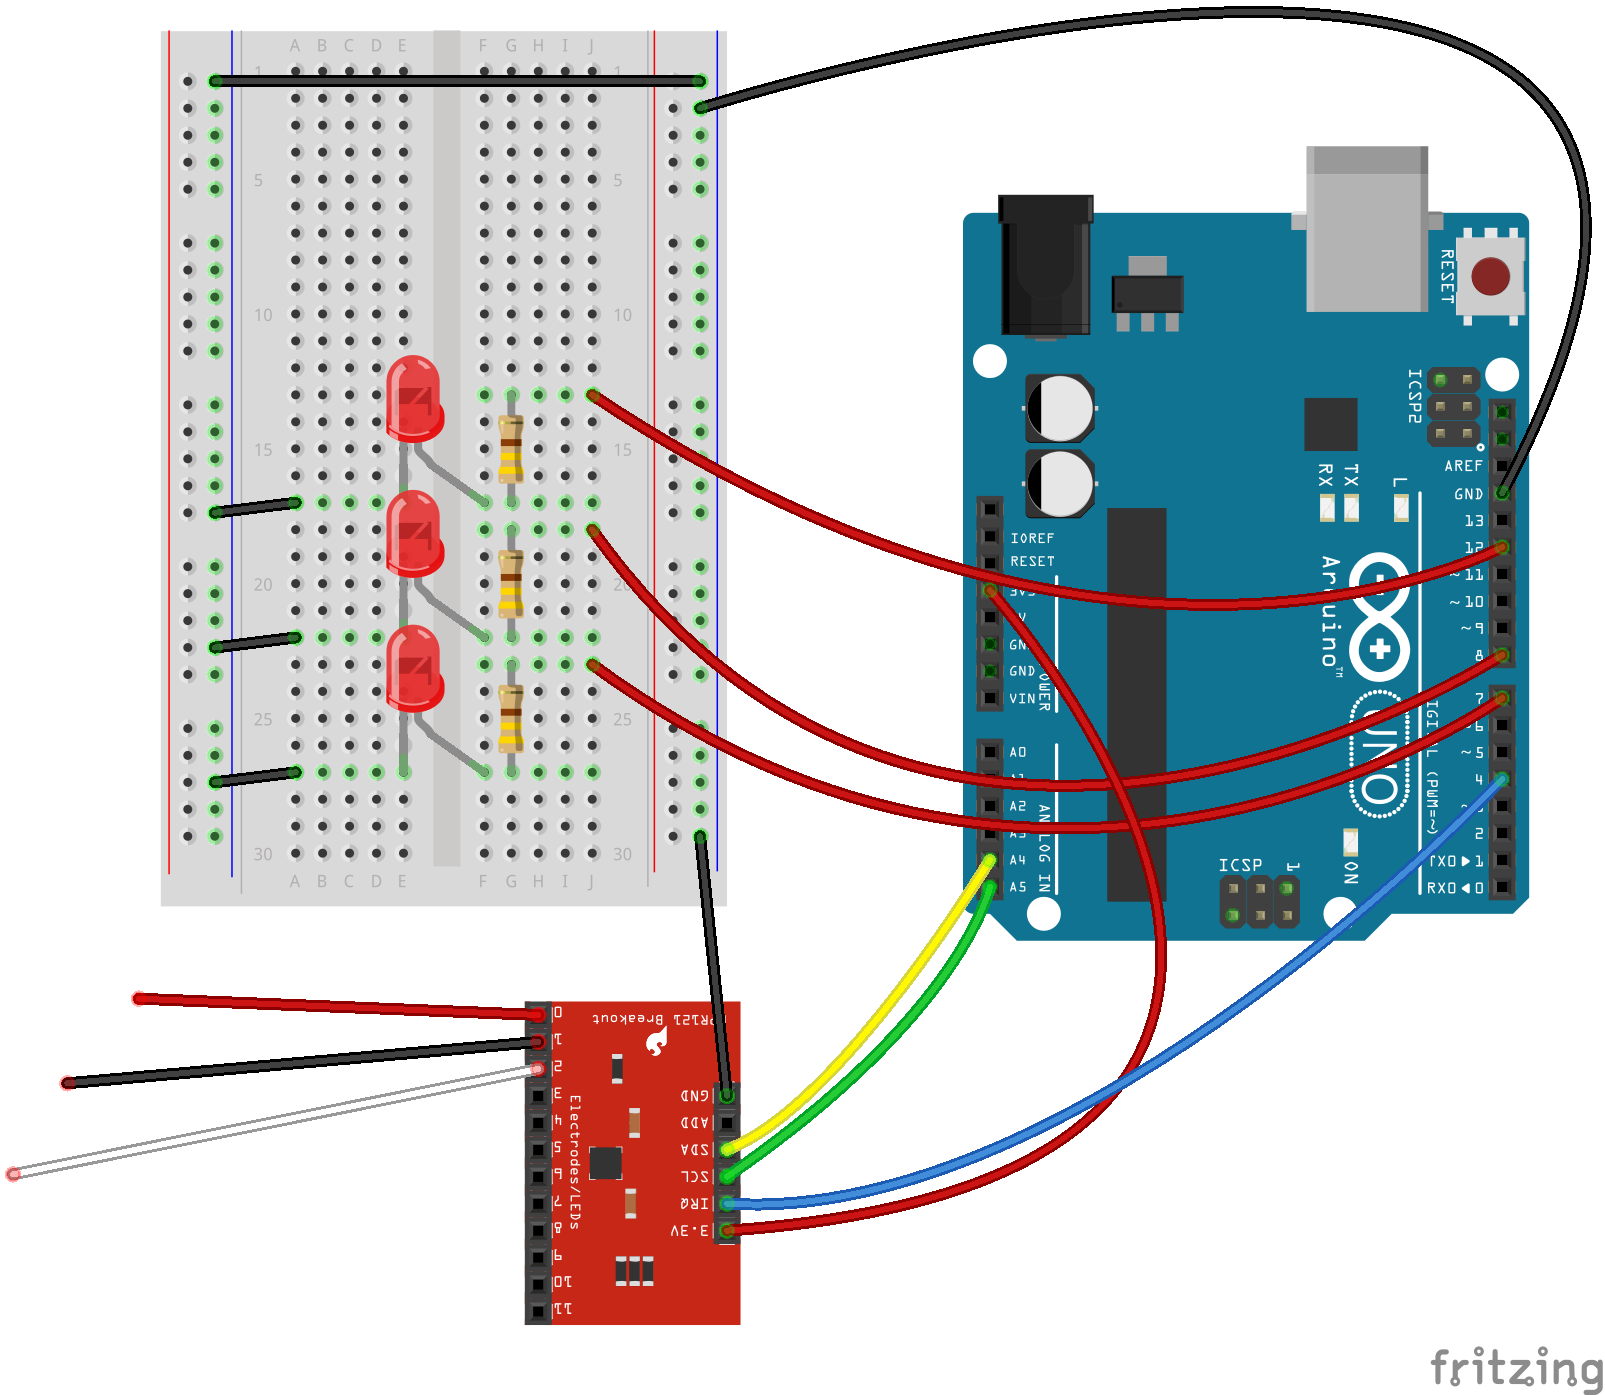
The example we made you download is a part of the setup shown on the diagram below… Basically, we have made a toggle, button, and proximity sensor turn on a LED. Nice.
This is just to provide you with a working example of how to use the MPR121 to make toggles, buttons and/or proximity sensors – you can switch out the LED’s with whatever…
How do you make a toggle?
First of… a toggle is kind of like a button that saves it state when it isn’t touched anymore. you know – a press once for on, once for off kind of thing… Our tutorial has an example of how to do this. This is how it is declared if you use our example, simple right?

We use it to trigger an LED, but you can do whatever you want within the if statement.. And you can have up to 12 of them, remember?
If you want to know how the toggle function works, you can read the documentation of the toggle function in the example. Now let’s look at those buttons…
How do you make a button?
So, a button triggers something when touched. In this case, it makes an LED turn on when you’re touching the electrode… This is how you declare it – seem familiar?

If you want to know how the button function works, you can read the documentation of the toggle function in the example. It’s quite simple actually…
How do you make a proximity sensor?
Proxemics! Cool! This one has an extra trick up its sleeve… a threshold! Look at that 20 when setting electrode 2 as a proximity sensor? That is the threshold… the lower it is, the more sensitive the sensor will become. You need the threshold for the Arduino to know when you’re close enough to the sensor.

So, how do you know what threshold to set? You don’t really… But you can find out!
First off make sure to set the ‘calibration’ bool to be true in the top of our example. This makes the Arduino print the change in capacitance of the electrode in the serial monitor in the Arduino IDE. It should look something like this…
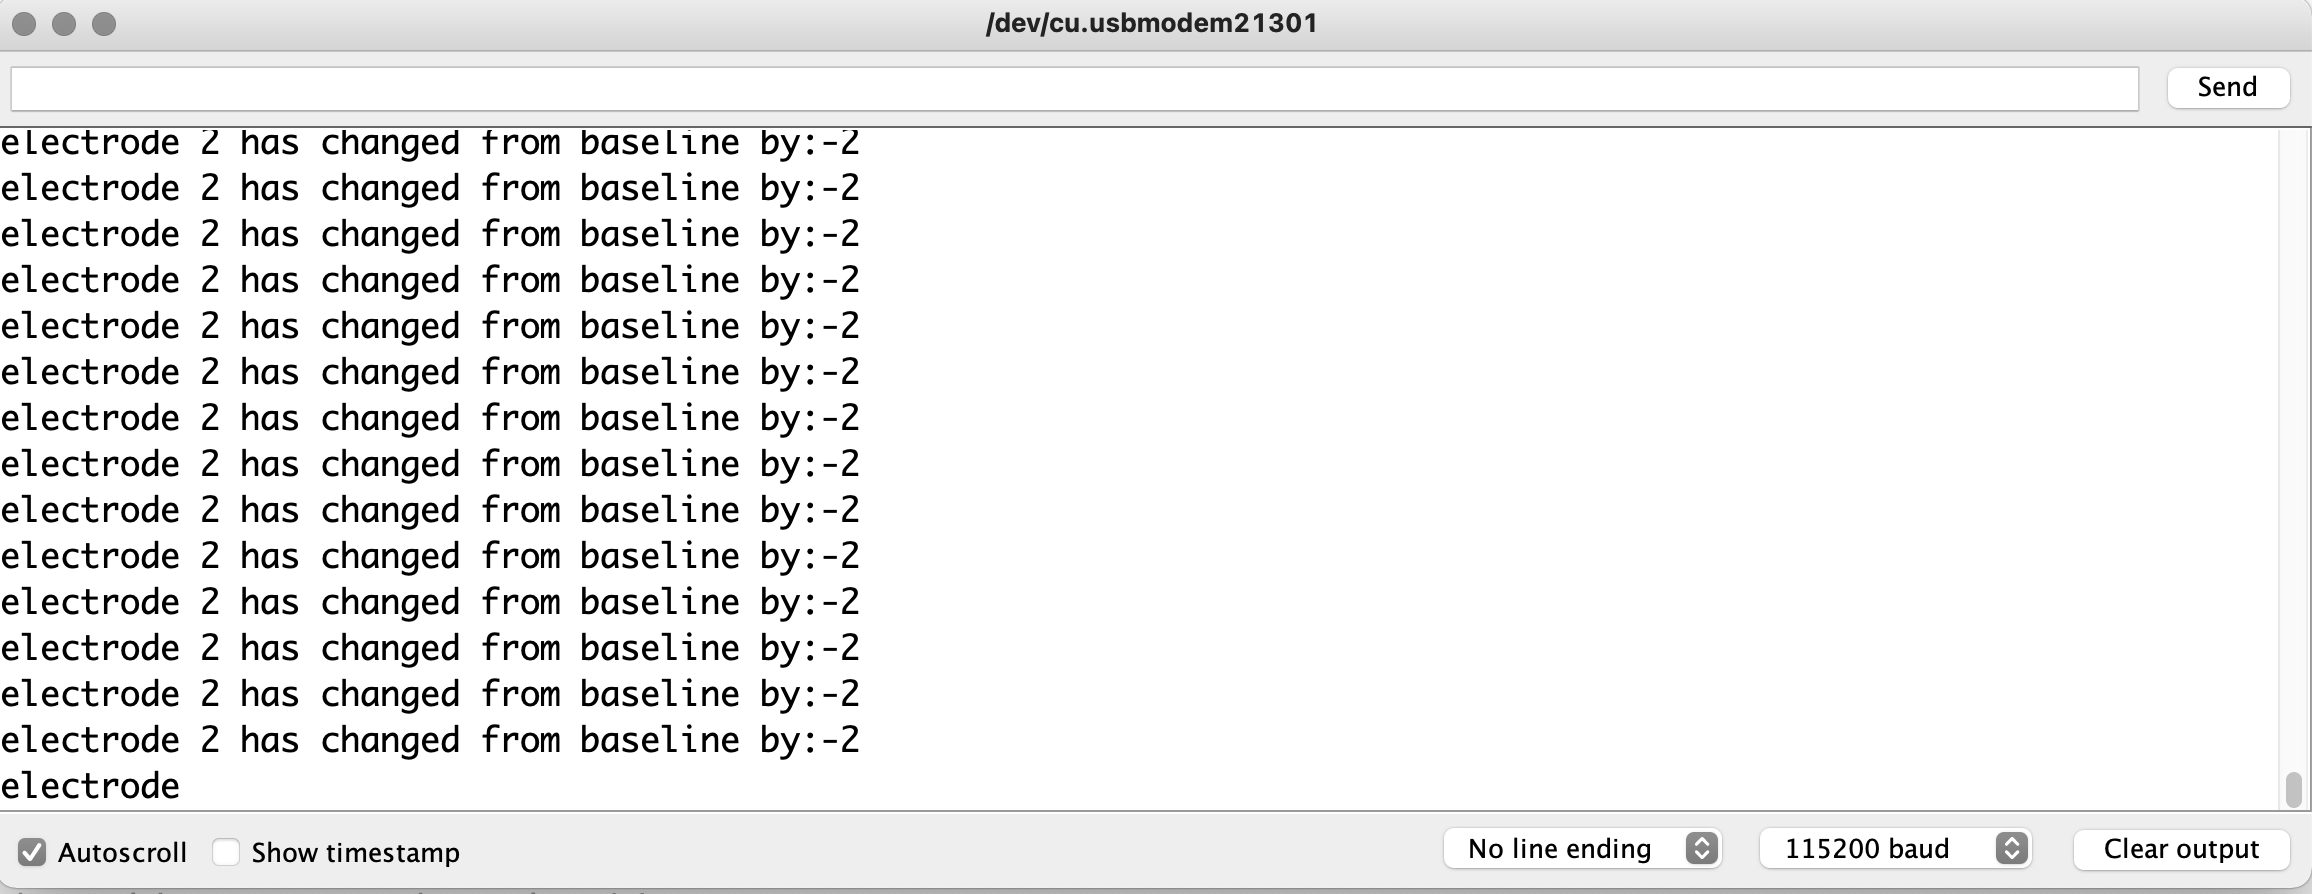
Okay… Now try putting your hand closer and closer to the sensor. See how the values become higher as you approach? This is where the threshold comes into play. When the measurement of the electrode exceeds the threshold, you can trigger something to happen… the lower the threshold, the more sensitive the sensor becomes… sick right?
Want to know more about how the proximity sensors work? You guessed it! it is documented in the example code.
Best practice with capacitive touch sensing
Okay so, we’re not quite done yet. The thing about capacitive touch sensing is that it is… sensitive? Electricity is weird, and you’ll probably experience that when working with capacitive touch sensing… Measurements can be all over the place sometimes. So here is some good advice to avoid that in your project!
- Ground your Arduino, or keep your laptop plugged into its charger (if your Arduino is plugged into it). This makes sure the MPR121 has more stable readings..
- Finish building your setup before adjusting the sensitivity of the electrodes or proximity sensors. This will save you a lot of time! The measurements from MPR121 are very sensitive, and how it is built into a prototype or sketch can make a huge difference. Noticed the black tape in the video? Yeah, that’s why…
- Cable management is key. Make sure your wires aren’t running to close to each other or can move about too much. The movement of a wire will often be enough to trigger an electrode… This advice is key to making a good proximity sensor setup!
Further knowledge
Okay so here’s some extra reading if you want to learn more about capacitive touch sensing…
This link explains a lot of the principles behind capacitive touch sensing and shows you how to build your own… we would probably advice against spending your time on that though. https://playground.arduino.cc/Main/CapacitiveSensor/
This is the actual MPR121 library by Bare Conductive. A lot of functionality is documented in here, so if you are wondering how to something, have a look at this. https://github.com/BareConductive/mpr121/blob/public/MPR121/MPR121.h