When working with Raspberry Pi it can be useful to do complete backups of the SD card. The most obvious reason relates to securing your prototype if something breaks, but it also allows you to quickly revisit old projects without setting up a new OS. The backup is created with the imager tool applePiBaker. The resulting diskimage is a compressed file that mirrors the entire SD card. Upon restoring, the image is burned to a new SD card in compressed state and subsequently expanded in the Raspberry Pi config.
What you will need
- Raspberry Pi
- micro SD card from a functional Pi that needs backing up
- micro SD card reader
Download and install the applePiBaker software
Download and install the SD Card Formatter software
Backing up a micro SD card from a Raspberry Pi
- Launch applePiBaker
- Insert the SD card from the Raspi that needs backup
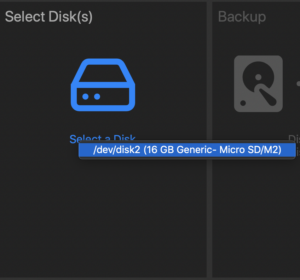
- Click “Select Disk”, and click on your SD card:
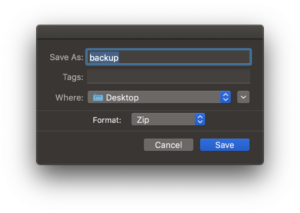
- Click “Disk to File”, and select a location for the image file. Format should be ZIP
- Make sure that you’ve enabled “Linux Partition Resize” in the options bracket. This step is it important and will save you both time and space from the resulting image file being compressed.
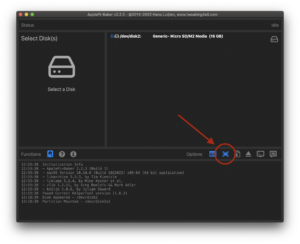
- Click “Save” and wait for the imager to finish up. This can take up to several minutes depending on the size of your Raspi installation.
Thats it! Eject your SD card and reinsert in your Raspi.
Restoring a micro SD card from a Raspberry Pi backup
When restoring a Raspi image to an SD card, the card must initially be wiped using SD Card Formatter prior to restoring your backup.
- Launch SD Card Formatter
- Insert a disposable SD card that you wish to use for restoring your Raspi installation
- Select the correct SD card and click “format”. You will need to authorize the process with admin credentials.

- Launch applePiBaker and select the newly wiped SD Card. Note that by default of SD Card Formatter, this will be named “boot”.
- Make sure that you’ve disabled “Linux Partition Resize” in the options bracket! Note that this is opposite from creating a backup as shown above.
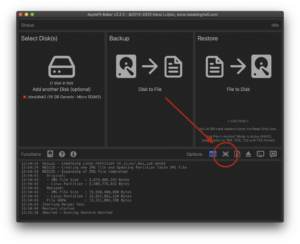
- Click “Restore” and locate the Raspi image backup.
- Click “Open” and wait for applePiBaker to finish up. As when backing up, this can take up to several minutes
Thats it! Remember to expand the linux partition on the Raspi as shown below.
Expanding Filesystem with Raspberry Pi
Once the SD Card has finished restoring, the filesystem must be expanded. We can do this in the raspi-config via SSH.
Note: If your restored backup runs a desktop version of Pi OS, you can skip the SSH-part and connect screen, mouse and keyboard before booting. In this case, launch a terminal on your Raspi and launch raspi-config as shown below.
- Boot the Raspi and ensure your computer is connected to the same wifi.
- Open a terminal window and login to your Raspi using the following SSH command.
By default the username is pi, the hostname is raspberrypi and password raspi.
Note: If these were altered before creating the backup, they will remain altered.
ssh pi@raspberrypi.local
- Once logged in, launch the raspi-config GUI with the following command:
sudo raspi-config
- Navigate to “Advanced options”, hit enter. Locate “Expand Filesystem” and hit enter

- Navigate to “Finish” and reboot your Raspi when prompted
Thats it! Your Raspberry Pi has now been restored completely!