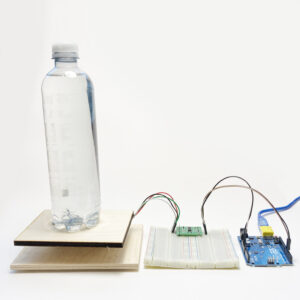
This tutorial will show how to setup a load cell with Arduino. Load cells comes in a variety of forms that allows for different tasks and categories of weight. They generally work by converting force into resistance, which can be measured and used in a broad variety of projects. This tutorial will use a single-point rectangular load cell rated for 20kg. This cell requires fastening between two surfaces to function properly. We will use the HX711 wheatstone bridge to measure with Arduino.
You will need
- Load Cell, 20kg rectangular, fastened between two surfaces.
- HX711 wheatstone bridge
- Arduino + USB-cable
- Breadboards
- Jumper wires
Building the setup
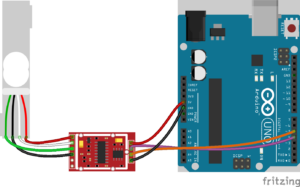
Connect everything as shown on the diagram below. Be aware that the wheatstone bridge won’t fit properly on a single breadboard.
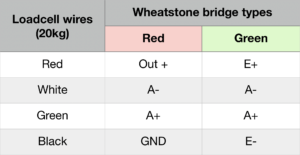
NB: The wiring may vary depending on the type of wheatstone bridge. Please refer to the following matrix:
Running the code
When working with load cells the program must initially measure the tare (zero) weight, and following this needs a known mass to calibrate. The known mass can be grams for convenience, but is not important. The example provided is based on a simple kitchen scale-style setup. When starting the program, the tare-weight is measured and will following request a known mass of 500gr to calibrate.
- Download the HX711 library and install it in your Arduino IDE
- Find and download the AIRLab example code here
Install the library and upload the AIRLab example code to the Arduino. Confirm that the programs work and test out the accuracy of the scale.
Thats it! You’re all set!