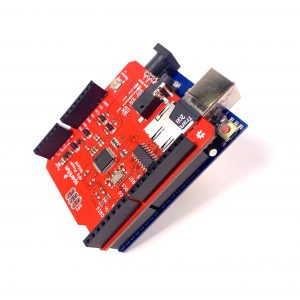
The Sparkfun mp3 player shield, is the AIR LAB default infrastructure for enabling the Arduino UNO’s to play mp3 files.
This guide is focusing on the exact steps you need to take, to make it work with our hardware, and the ressources we have tested are working together. This guide assumes a basic knowledge of Arduino (how to upload and run a program etc.)
DISCLAIMER: Working with mp3 files on an Arduino is often a bit of a struggle, which is why we always suggest to use something more suitable for playing sound. Our goto platform for this is a laptop running Processing code, if possible with the hardware setup for the given project. The processing code on the laptop can then quite easily be setup to communicate with an Arduino board if needed. There are many different advantages with this type of setup, but depending on your project you might want to go one way or the other.
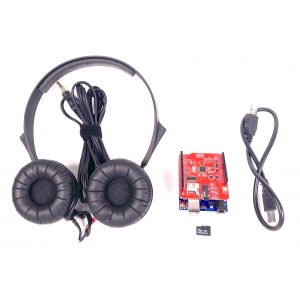
HARDWARE:
– Arduino Uno
– USB A to USB B cable
– Sparkfun mp3 player shield (version v15)
– micro SD card (2GB)
– Headphones (wired with a mini-jack / 3.5 mm connector)
STEP 1: (formatting SD card)
Format the SD card using one of the following two methods
– Use the SD card formatter station in the AIR LAB
– Use the steps in this guide for doing it from your own computer
STEP 2: (preparing files)
– Collect the .mp3 files you would like to use in one place.
– Change the file names to (track001.mp3, track002.mp3, track003.mp3 etc.)
– Copy the files into the root folder of the SD card.
NB: If you need to convert sound files to .mp3 Audacity is a good solution for this.
STEP 3: (installing Arduino libraries)
If you are new to using and installing libraries? (read this)
– Open Arduino, and navigate to the library manager
– Install SdFat (by Bill Greiman) – current version is 2.2.2
– Install vs1053 for use with sdfat (by Michael P. Flaga, Bill Porter) – current version is 1.3.0
NB: this process was tested with version 2.1.0 of the Arduino IDE
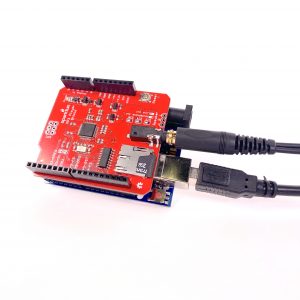
STEP 4: (testing the setup)
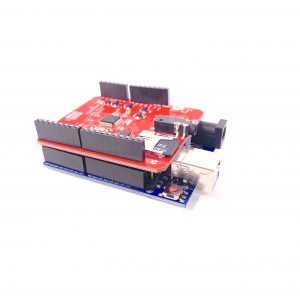
– Insert the 2GB micro SD card in the mp3 player shield.
– Mount the shield on your Arduino UNO and connect the headphones to the shield
– Connect your Arduino to your computer.
– Open and upload the example sketch called ‘Demo’ from the “vs1053…” library.
– Open the Serial Monitor in the Arduino IDE, and set the baud rate to 115200.
– There should now be printed some guidlines for how to test the different functionalities.
– Type key ‘1’ in the input field (then press ‘enter’) to play ‘track001.mp3’.
– Type key ‘s’ (then press ‘enter’) to stop it again.
If all this works you are ready to start writing your own code.
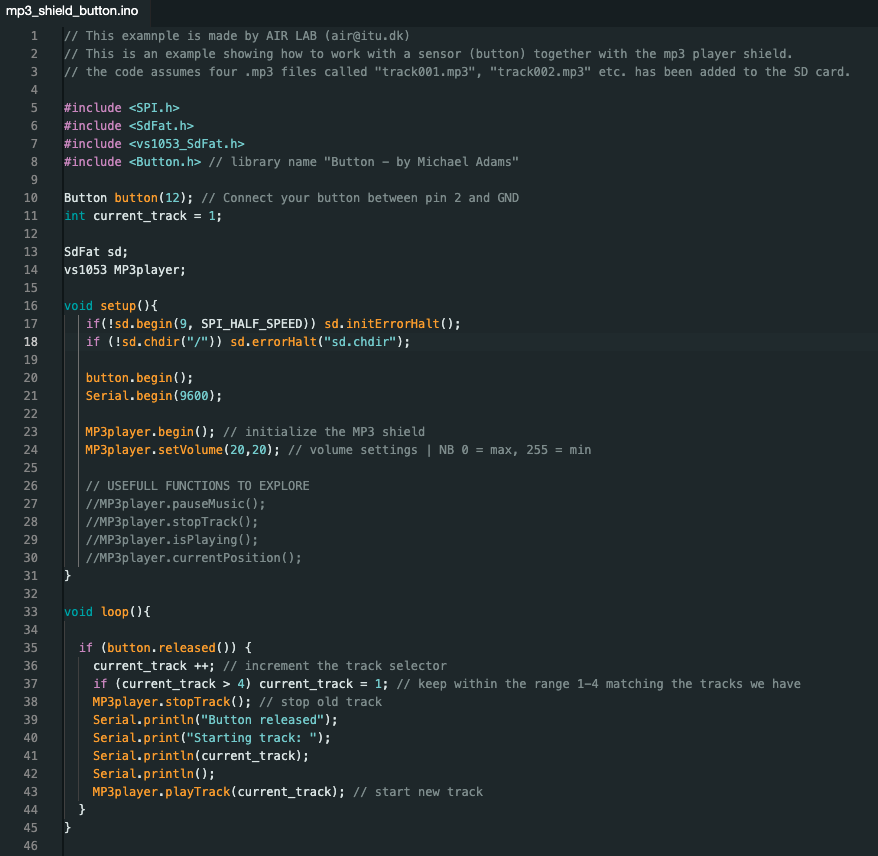
EXAMPLE CODE
Here are two example codes to help you get started, since we find the ones included in the library too complicated. The included examples are still very good ressources for learning about the many different features (functions etc.) of the library, and testing the shield whenever in doubt of it working correctly.
Source code on GitHub
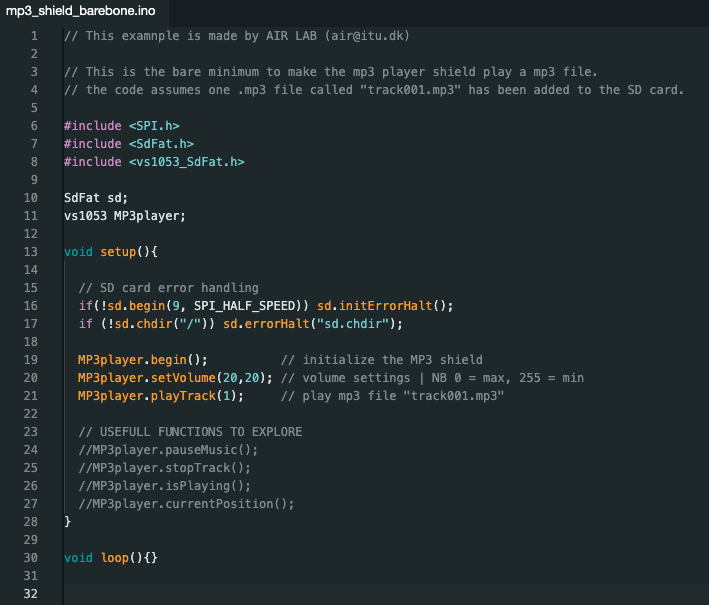
Minimal code to get started (1 mp3 file)
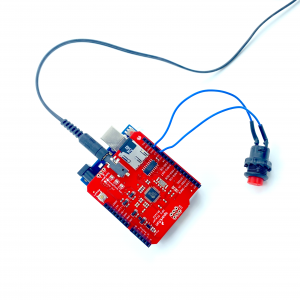
Button player (4 mp3 files)