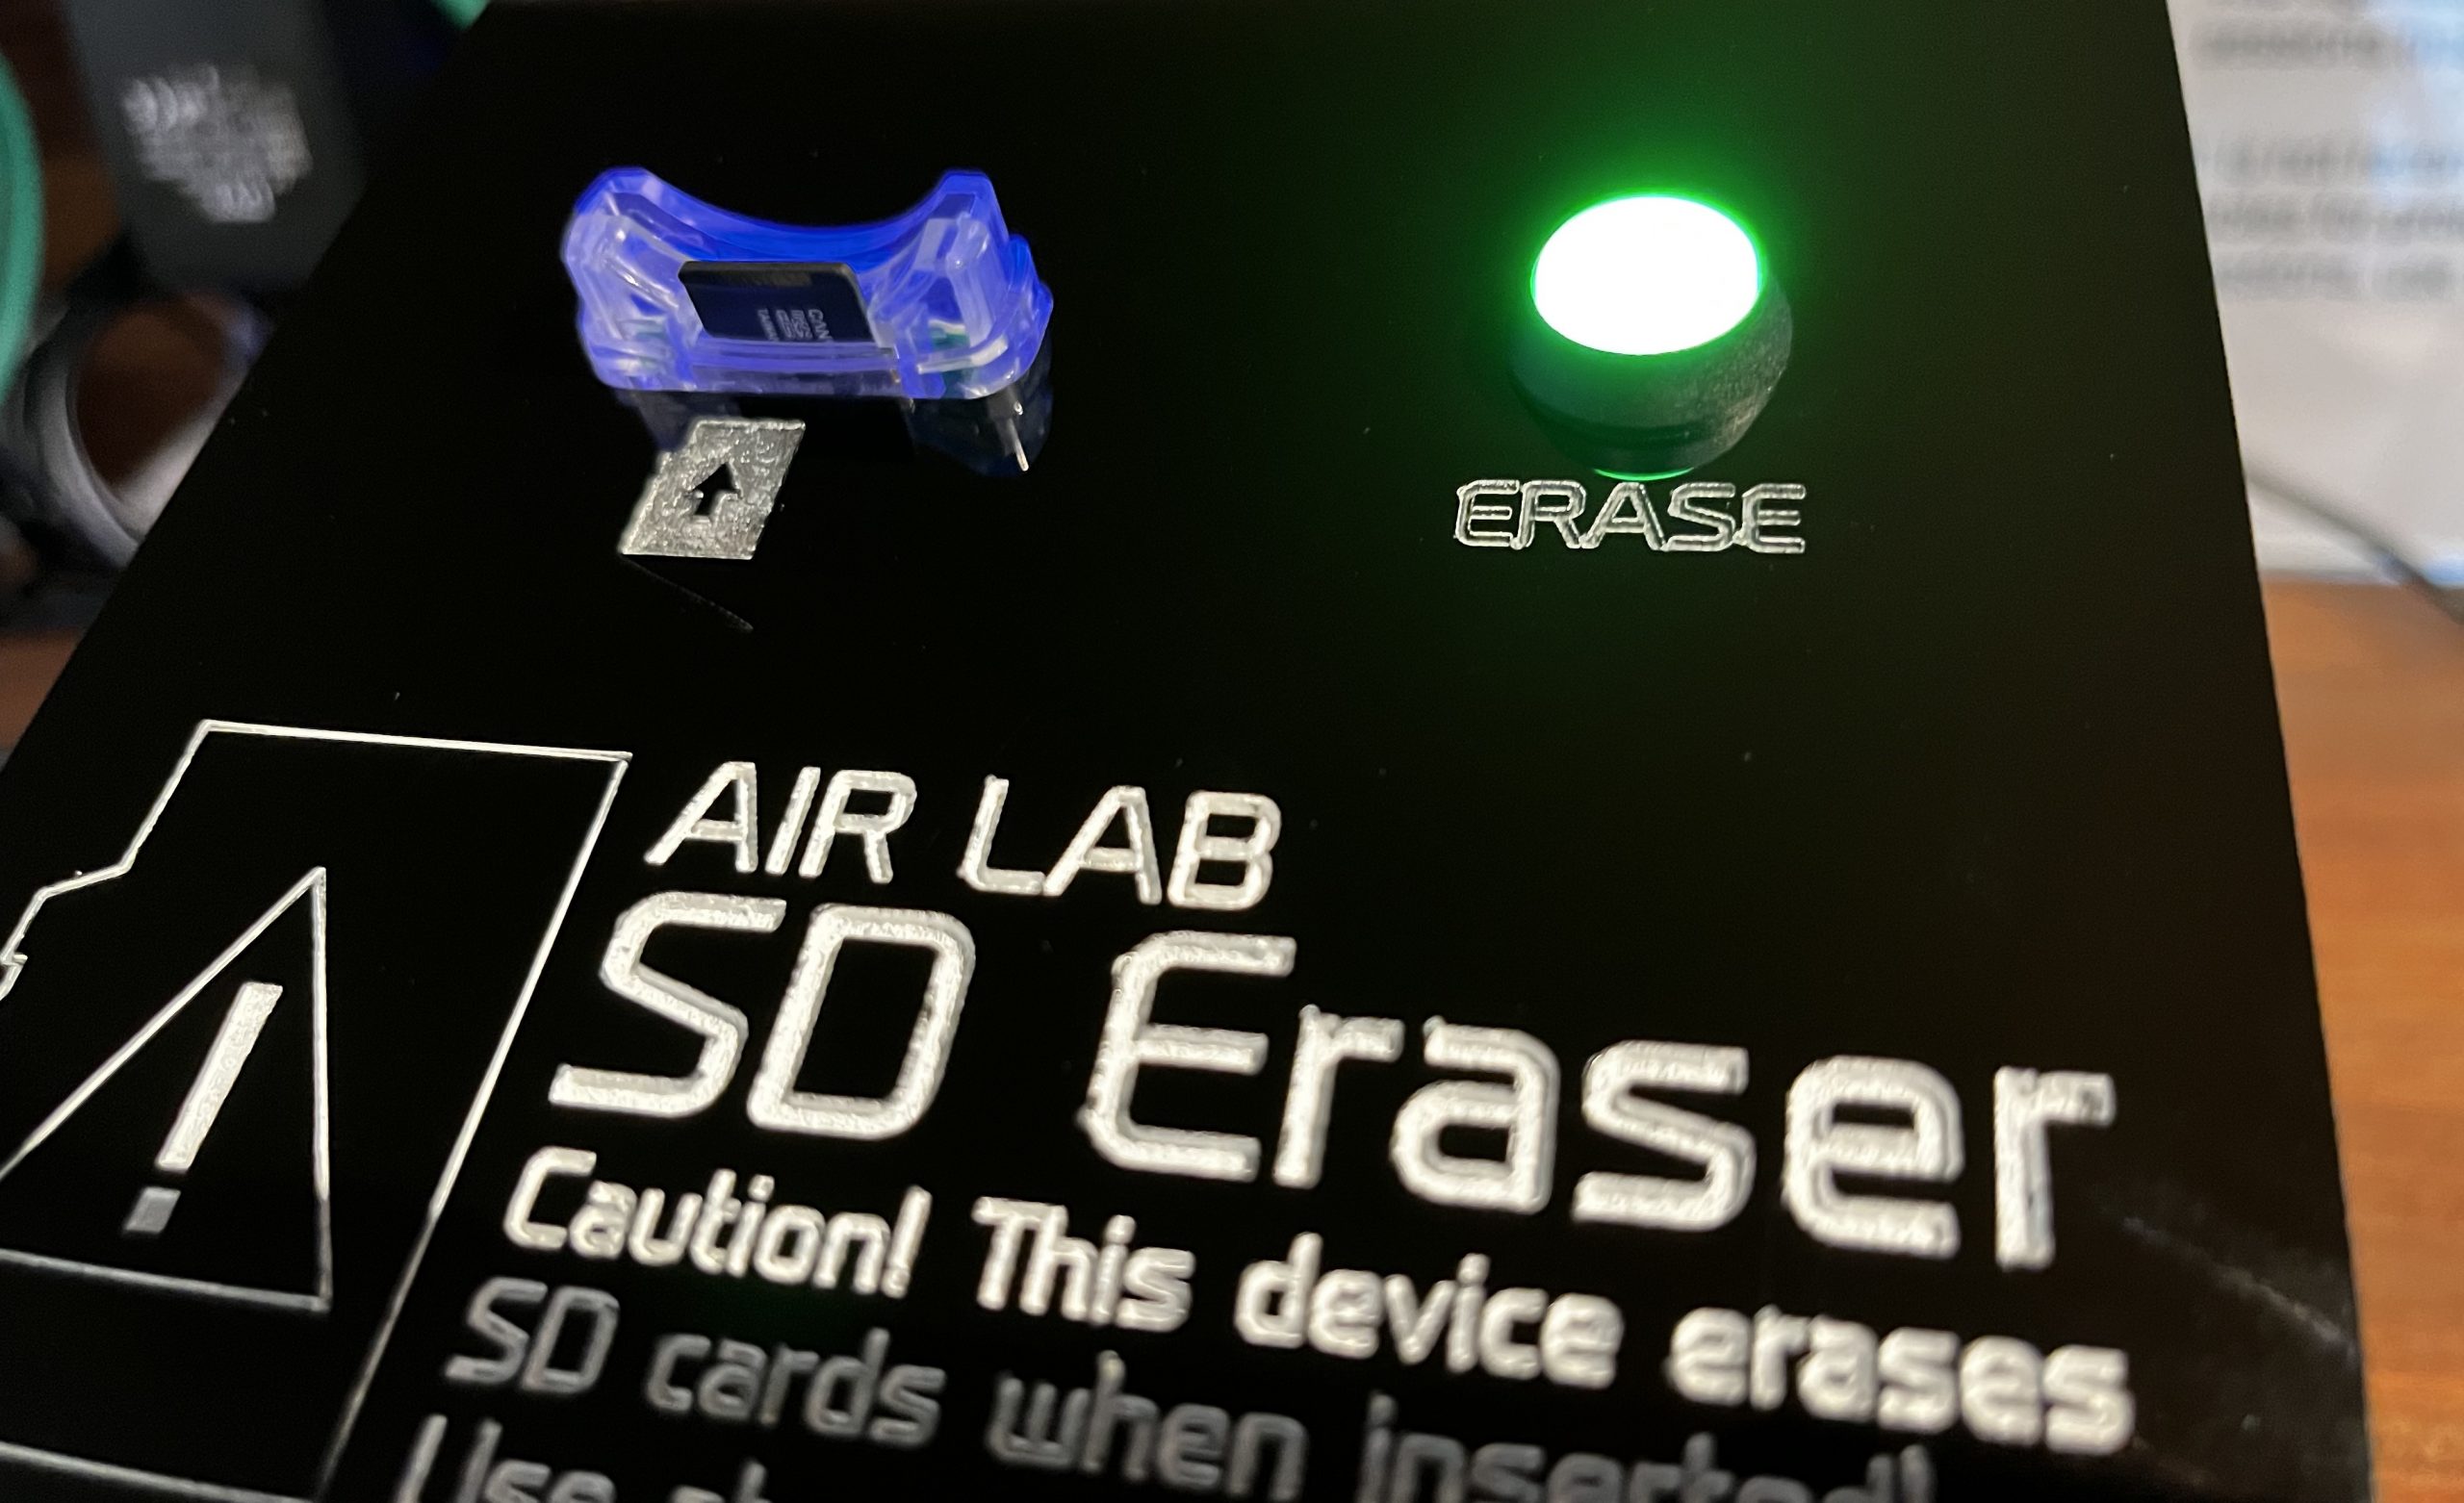
SDeraser is an AIRLAB Infrastructure that enables easy formatting of SD cards via a simple interface in the lab. This interface is useful when handling larger amounts of Raspberry Pi’s, zoom recorders or similar where quick formatting of SD cards is necessary. The interface is a simple build consisting of a Raspberry Pi, an illuminated pushbutton and an SD card reader. The Raspi is running a python script that automatically detects newly inserted block devices (such as SD-cards or even USB drives), and subsequently erases the device using the ubuntu software called “parted”. This tutorial will walk through setting up the Raspi, and explains the functionality of the code.
Formatting vs wiping
Before we build, it’s important to understand what the device does in terms of “erasing” data. The pythonscript we use in this tutorial is ~technically speaking~ only formatting the SD card which is not the same as wiping(!). While the specific differences vary slightly, a general rule of thumb is that wiping a storage device overwrites it with scramble data while formatting prepares a storage device to be overwritten as it is used again for new storage. This means that after formatting an SD card it is ~technically speaking~ possible to retrieve formatted data, because it is still there, even if it’s not visible. On the other hand, wiping data takes a great deal of time as we’re effectively filling the entire storage device with random data. Formatting is therefore useful in quick day-to-day scenarios – such as when starting from scratch with a Raspberry Pi project, or when emptying your camera after saving images to your computer… BUT in legal terms, it is safer to wipe your storage devices in less safe cases or when handling sensitive data. SO – a general reminder to be mindful of how you handle data, and a disclaimer to use this tutorial at your own risk, is hereby emphasised!
With the terminology and legal stuff out of the way – let’s get started!
Materials needed
- Raspberry Pi incl peripherals (Screen/mouse/keyboard) and PSU.
We use the Raspberry Pi 4 8GB ram mounted in argon case for cooling. - SD cards one for your Raspi, another for testing the script
- Momentary Pushbutton – ideally with a dual color LED built in.
- SD card-reader USB dongle for accessing SD cards to erase.
You will also need to access our Github Repository to access the scripts!
Setting up the Raspberry Pi
Assuming that you know how to set up a Raspi, we will work from a fresh Raspi OS setup that has access to the internet. If you need help setting it up, you can find a brilliantly brief guide here!
Basic preferences
Firstly, we will need to disable the filemanager popup window that prompts the user when an SD card is inserted.
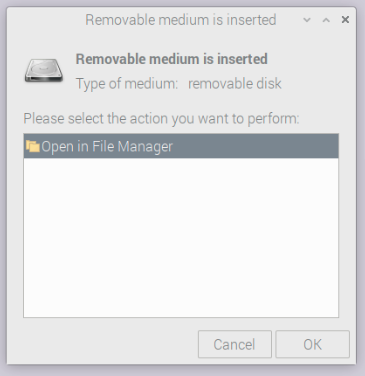
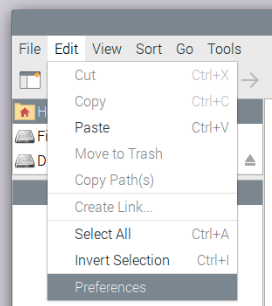
Open up a filemanager window (the yellow folder icons), click edit, click preferences
Go to volume management and deselect “show available options for removable media when they are inserted”

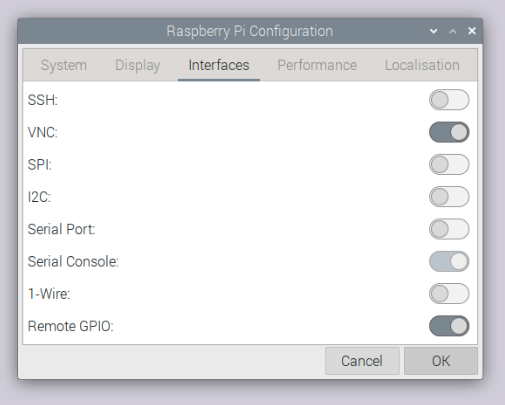
Secondly, open up the Raspberry Pi Configuration under preferences in the Raspi menu and go to the interfaces tab. Enable “Remote GPIO”. Optionally you can enable VNC or SSH if you require alternate ways to access your Raspi in the future.
Reboot your Raspi by opening up a terminal and typing (without the ‘$’):
$ sudo reboot
Terminal interactions
Open up a terminal window. As with every new Raspi, we will need to run a few update prompts. Type the following commands, and notice that this step may take some time depending on the update. Don’t forget to omit the ‘$’ and hit enter for each line:
$ sudo apt-get update
$ sudo apt-get upgrade
$ sudo apt-get install parted
Following this we need to clone the aforementioned Github Repository to allow easy access to the scripts needed:
$ sudo apt-get install git
$ mkdir gitcode
$ cd gitcode
$ git clone https://github.com/airlabitu/SDeraser.git
You can check if you successfully cloned the repository by navigating further to the folder with ‘cd SDeraser’, and typing ‘ls’ to check if the scripts have been downloaded. You can always fetch the latest version by typing ‘git pull’ when inside the SDeraser folder.
Finish by navigating back to the home directory:
$ cd
Manually formatting an SD card with parted
Initially we will walk through the series of commands that performs the actual formatting of an SD card on the Raspberry Pi. As mentioned, the functionality is based on the linux software Parted
Start by inserting an SD card to the external SD card reader and plug it in to the Raspi. To list the available volumes, or block devices, open a terminal and type:
$ lsblk
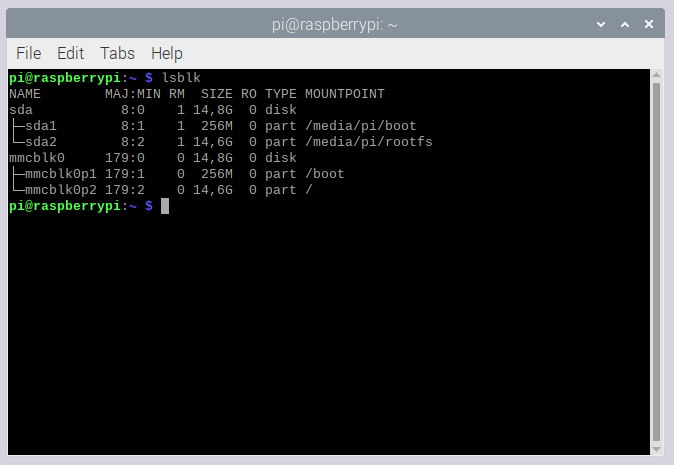
The SD card in this case is named ‘sda’ and has two partitions: sda1 and sda2. Usually, the SD card will be named sda, sdb, sdc etc., but you can remove the SD card and run lsblk again to double check.
Start by unmounting all partitions under sda. You can remove them individually, or add a ‘?’ to the path to remove all partitions following the specified primary block:
$ sudo umount /dev/sda?
Next, we need to create a fresh partition table using the ‘mklabel’ command. We add the ‘-s’ (–script) to avoid prompts for user intervention, and ‘-a optimal’ (–align) to configure blocks for optimal performance. Type:
$ sudo parted -s -a optimal -- /dev/sda mklabel msdos
Then we will create a partition on the SD card using the ‘mkpart’ command. The partition is specified as preview fat32 and instructed to fill the entire volume (starting at 1MiB and ending at 100%). Type:
$ sudo parted -s -a optimal -- /dev/sda mkpart primary fat32 1MiB 100%
We can check that the alignment of the partition is optimal with the ‘align-check’ command. Since we still use the script mode, the terminal will only print something if the alignment is not optimal; no news are good news. You can remove the ‘-s’ to get a message printed also if alignment is correct:
$ sudo parted -s --/dev/sda align-check optimal 1
Finally we will format the partition to fat 32:
$ sudo mkfs.vfat -F32 /dev/sda1
And thats it for formatting SD cards with Raspberry Pi! For further reading you can visit:
Automating formatting with Python
Now that we’ve seen how parted can effectively format an SD card, the next step is to automate the process. With Python we can use the ‘Os’ and ‘Subprocess’ modules to perform the Parted terminal commands exemplified above.
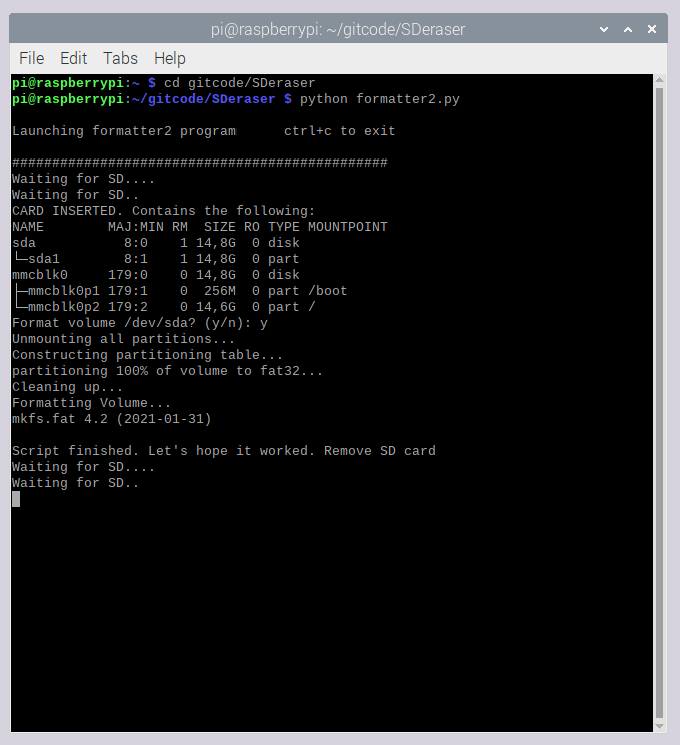
Navigate to the SDeraser repository and launch the formatter2.py program
$ cd gitcode/SDeraser
$ python formatter2.py
The program will continuously check for newly inserted block devices. As such, if an SD card is inserted, it will prompt the user to confirm formatting of the first item of the list, if the name of the block starts with ‘sd… ‘. Once the program runs, you can insert an SD card. Once deleted, the program returns to search for SD cards until another one is inserted.
Setting up a physical interface
The above formatter2 program provides an automation once python is running, but since the system works with terminal interaction it requires a screen and a keyboard. We believe a user interaction is important to avoid the (possibly horrible) mistake of unintentionally formatting an SD card. On the other hand, the system is just too simple to use screen and mouse. Therefore, we opt for GPIO input with a button as interface for formatting SD cards with a Raspberry Pi.
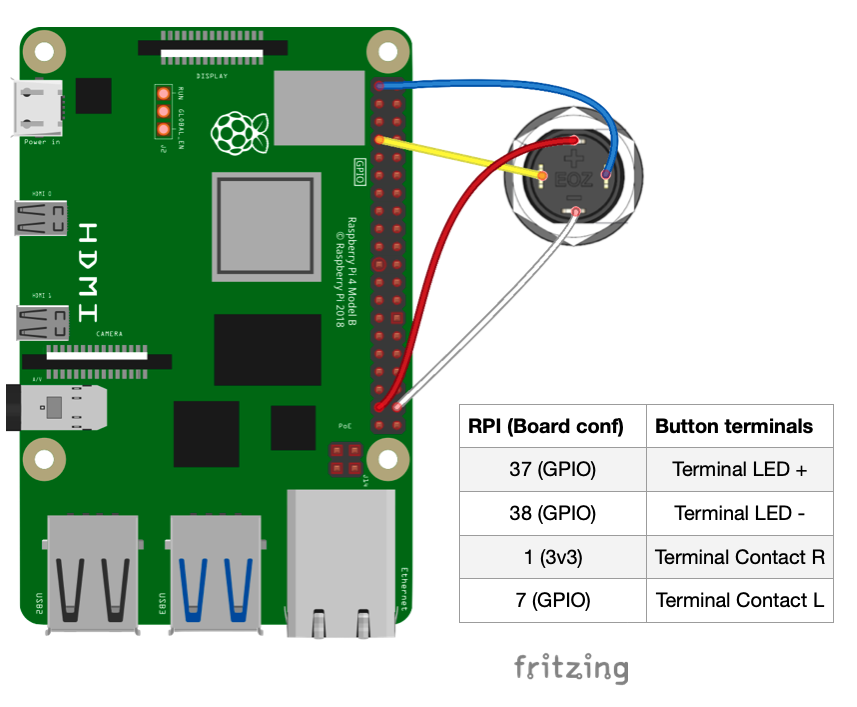
The button we use contains a dual color LED that lights up red or green depending on the direction of the current. This means that a green light would require pins 37=HIGH and 38=LOW, while a red light would require this inverted where pins 37=LOW and 38=HIGH. Changing direction of current is performed in the provided python script (as elaborated further below). Start by wiring up the button to the Raspi following this schematic:
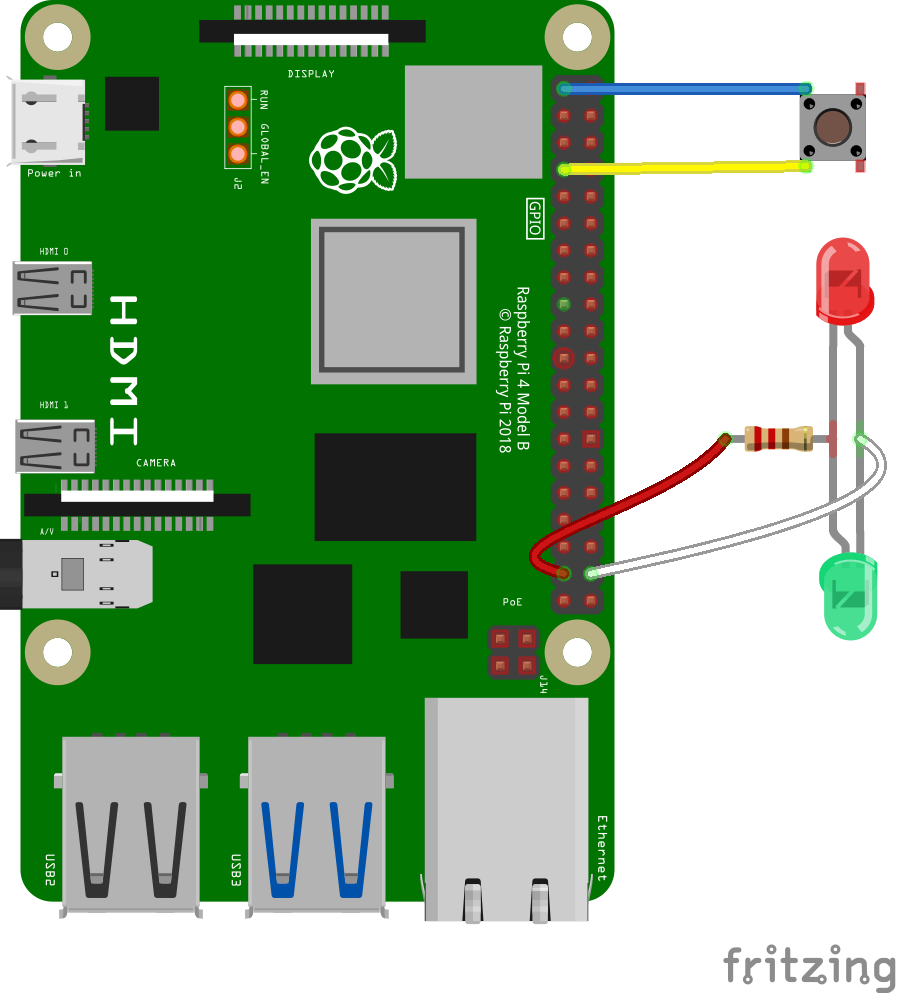
If you cannot get hold of a dual color illuminated button you can simply use a standard momentary button and two separate LEDs instead. With such a setup you will need wire the separate LEDs in parallel with opposite polarity and a resistor by following this schematic:
With one of the above schematics build, return to the Raspberry Pi terminal and launch the gpio2.py program to quickly test that everything is wired corectly. You can skip the first line if you are already in the correct directory from before:
$ cd gitcode/SDeraser
$ python gpio2.py
This program contains three functions to change direction of current and thereby light up the button/LED’s in the respective colors. A loop will briefly blink each LED once and wait for the button to be pressed before restarting. If everything works correctly, we are ready to launch the final script, sderaser.py:
$ python sderaser.py
This program is based on the formatter2.py program from before, but instead of prompting for confirmation in the terminal, the button lights up green to indicate that the program is ready to format when an SD card is inserted. Once the button is pushed, the button will light up red while formatting is performed, and briefly blink once finished.
To keep the interface as user friendly as possible, we laser cut a piece of acrylic to hold both button and SD card reader:
Running the script automatically after booting
The final step in this tutorial is to add the python script to autostart to make sure it starts each time the Raspi boots. This means that the raspi can simply be plugged in, and after a few minutes it will be ready to format SD cards automatically!
Start by returning to the home directory and create a sh file:
$ cd
$ sudo nano launcher.sh
With the nano editor open, add the following lines – or copy from the file in the github repository:
#!/bin/sh
cd /
cd home/pi/gitcode/SDeraser
python sderaser.py
Hit ctrl+s and ctrl+x to save and exit. Next we make the script executable:
$ chmod 775 launcher.sh
Next we need to create a user-side autostart file that contains the global autostart information and our newly created launcher script. Navigate to the global autostart script:
$ sudo nano /etc/xdg/lxsession/LXDE-pi/autostart
Highlight all contents from this file, right click and copy. Next create the user-side autostart script:
$ cd ~/.config/lxsession/LXDE-pi/
$ sudo nano autostart
Right click and paste the lines you copied from the global script. Add the following line ABOVE “Xscreensaver”:
@lxterminal -e "/home/pi/launcher.sh"
Once filled in hit ctrl+s ctrl+x to save and exit. The final script should look like this:
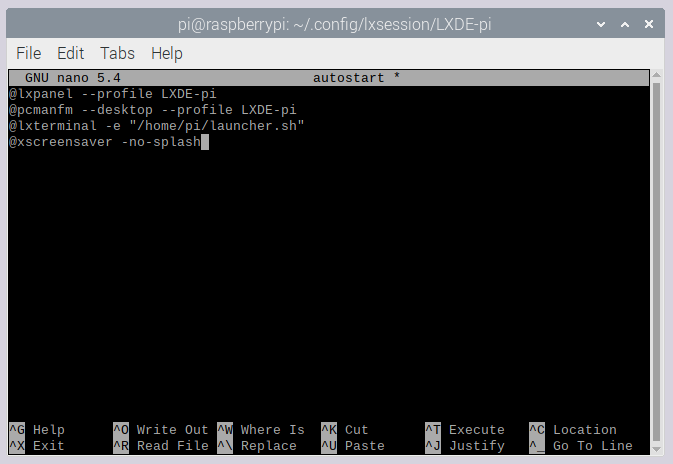
Reboot the Raspberry Pi to check that the script launches correctly.
And thats it! Your automatic SDeraser station is fininshed!