Introduction
This tutorial shows how to measure sound level in an environment using the KY-037 sensor and Arduino. The sensor offers two different outputs: A digital signal which is changed depending on a certain threshold of sound, and an analog signal representing the soundlevel. The sensor works best with audio/noise sources in close proximity.
What you will need
- Arduino + USB cable
- KY-037 sound sensor
- Jumper wires
- Arduino example code found via our GitHub Page
Preparing setup
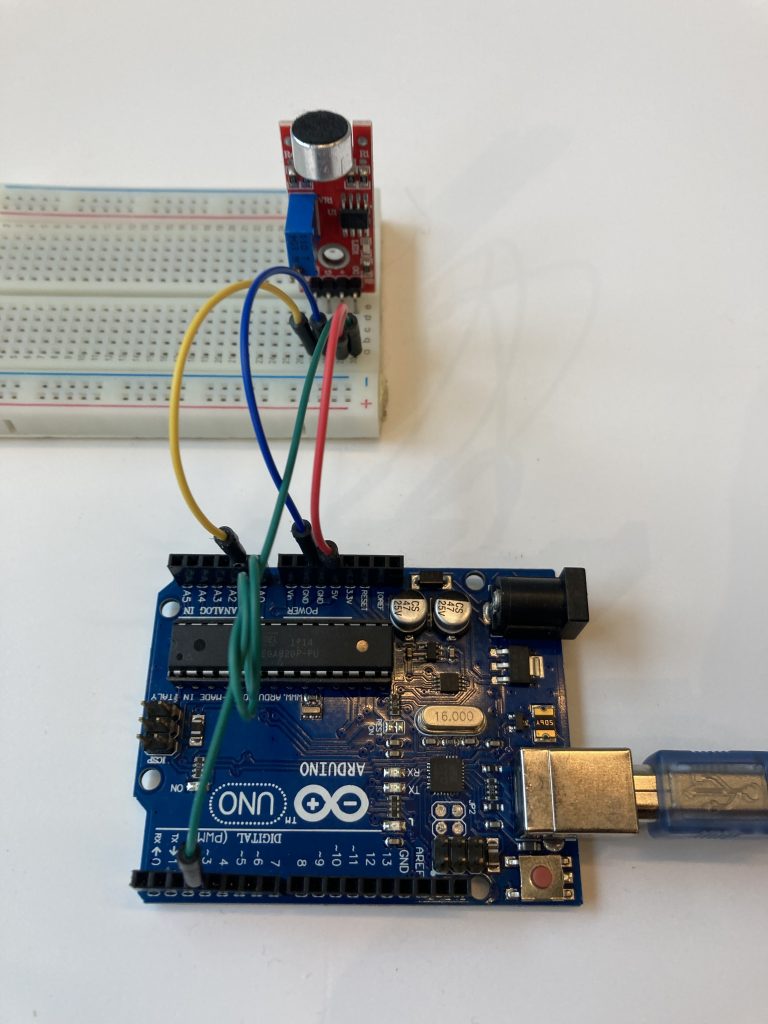
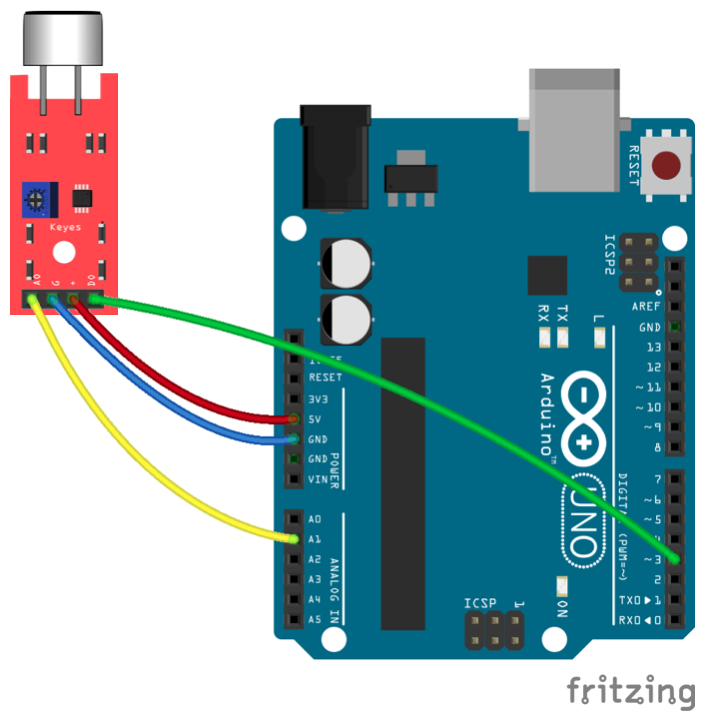
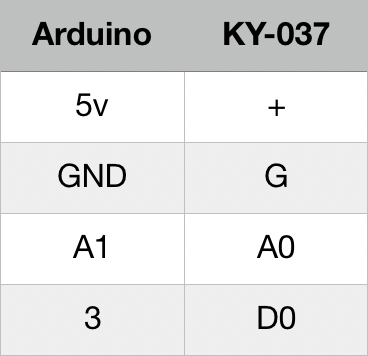
- Connect Arduino and KY-037 as shown on schematic and table below.
- Connect the Arduino to your computer and upload the code to the Arduino
Using the digital output with threshold
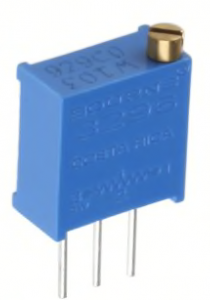
The D0-pin on the KY-037 module provides either LOW or HIGH depending on a certain threshold of sound. The threshold is defined with the blue trimpot located on the KY-037 module (see picture).
- Make sure the Arduino is connected, and launch the Serial Monitor – it should provide a stream of readings labeled “Threshold: x”
– 0, or LOW, means no to little sound
– 1, or HIGH, means that sound is detected - Using a small screwdriver, lower the threshold by turning the trimpot clockwise, until the serial monitor reads “Threshold: 1”.
- Working in small steps, now turn the trimpot counter clockwise and stop just after the readings change to “Threshold: 0”
- Tap the desk, or blow into the microphone to verify that the signal briefly changes to 1 and back to 0 when sound is detected
- You may need to adjust the threshold depending on the circumstances in your project.
Using the analog output to measure absolute output
The A0 pin on the KY-037 module provides an analog signal (0-5v) depending on the detected sound level. The Arduino code works by reading the background sound level once when powering up the Arduino. This is stored as a “baselined” value to subtract from the follow readings. Using the abs() function to avoid negative values in the signal, the program eventually provides an analoge signal which can be used in various context. The signal roughly varies from 0-15 depending on context
- Edit the code by removing the comment marks around the analoge section, and reinsert them in the section on digital reading
- Upload the code to the Arduino and open the Serial Monitor – it should provide a stream of readings labeled “Analog Value: x”
- Reset the Arduino by pressing the reset button while ensuring quiet circumstances.
- Once the Serial Monitor provides a stream of readings, you’re good to go!