The ATEM Mini Pro by Blackmagic Design is a versatile live production switcher designed for live streaming and video production. This comprehensive guide will help you get started and explore its capabilities.
Hardware Setup:
- Connect HDMI Inputs (Cameras/PC) : Connect up to four HDMI inputs to the ATEM Mini Pro. Ensure all inputs are powered on and set to HDMI output mode.
- Monitor: Connect an HDMI monitor to the HDMI output. This can be used to preview multiple sources and the program feed. But can also be used to present live.
- USB out (PC Control / Record to HD / Use stream as webcam): Connect a PC using USB-C to control the ATEM mini pro using the ATEM software. (This can also be done wireless if PC and ATEM is connected to the same network) While the Atem Mini is connected through USB-C you will be able to use the stream as a “webcam” source for online meetings such as Teams, Google Meet, and Zoom OR Connect a Harddrive to the Atem t0 record the stream to the connected drive.
- Audio Source: Connect microphones or audio sources to the audio inputs. You can also use external audio mixers for more control. (We recommend using the Sennheiser wireless microport. Two sets A and B with different frequency range. Note that noice can occur if you dont adjust the frequency).
- Network: Connect an Ethernet cable to the ATEM Mini Pro for control, monitoring, and streaming purposes. Make sure your computer is on the same network (If you plug in ethernet cable you need to reboot the ATEM, by disconnecting/connecting the power supply).
Power On:
Plug in the provided power supply and turn on the ATEM Mini Pro. The unit will boot up, and you’ll see the video feeds on the output hdmi (should be connected to a monitor). If you are connecting the Atem to the network using the Ethernet port, you should do so before before powering on the Atem Mini, or reboot the Atem after plugging in a Ethernet Cable.
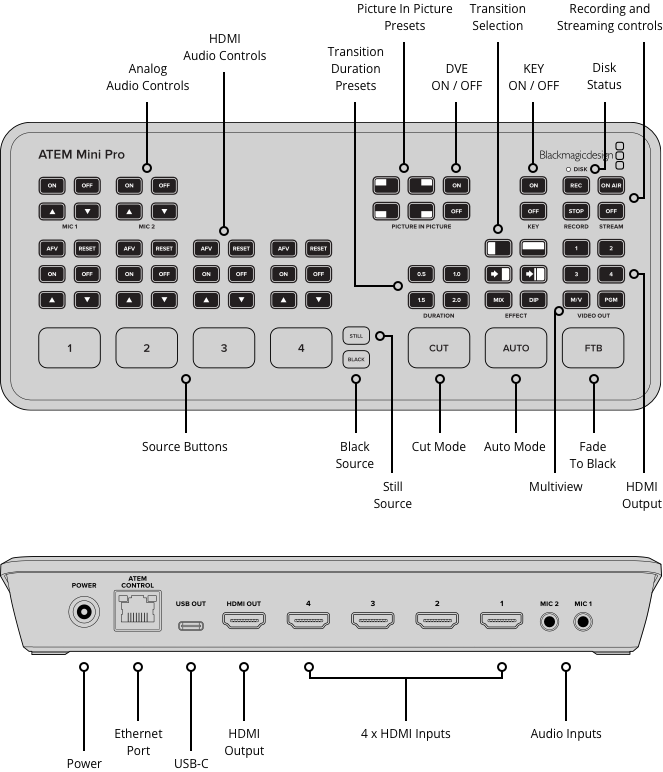
Buttons explaination
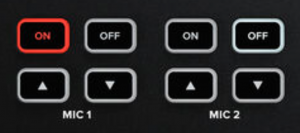
- Analog audio controls: These buttons control input mic 1 and 2. You can turn on and off the two microphones or controll the audio level.
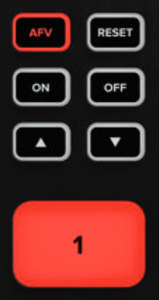
- Sourcebuttons: There are 4 source buttons used to switch view between the 4 HDMI inputs. Each Source button has its own section for controlling Audio input with the HDMI source. You have the same options as with “analog audio controls”, but you also have a button “reset” to reset the audio level. The “AFV” (Audio follows video) function only ouputs audio from the HDMI input when the video feed is used as output.
- Still / Black source: The black button cuts to a black screen. Whereas the Still button can be customized to display any image using the ATEM software on a PC

- Video out: This sections have 6 puttons to control what is outputtet to the Output HDMI. The M/V Multiview output is a powerful tool that lets you monitor all your sources and program on a single display. You can customize the layout to suit your preferences using the Atem Software. Use the MultiView to ensure your live production is going smoothly and switch sources with confidence.
PGM is short for Programme. When you press this button the HDMI Output is set to the final, mixed video output that is sent to your recording or streaming destination.
The buttons 1, 2, 3, 4 each corresponds to the HDMI inputs and will set the HDMI output to the corresponding input.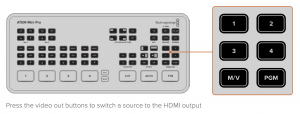
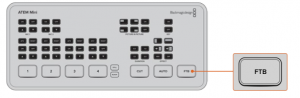
- FTB: Simply press the FTB button to perform the fade to black. The button will flash while enabled.
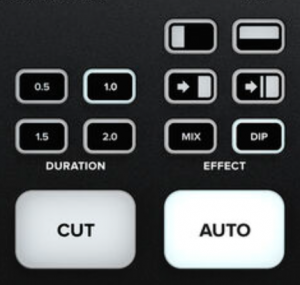
- Transition section: in this esction you are able to switch between two modes: cut or auto. Cut will do an instant transitions between HDMI sources. Auto is customisable both in durration and transistion animation.
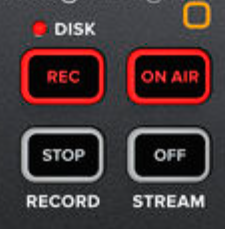
- Recording/streaming: When a compatible harddrive is connected the small DISK Led will light Green. The ligth will switch to red while Recording. This will allow you to use the “REC” (record) and “STOP” buttons. If streaming (configure using the Atem software), you can use the “ON AIR”, and “OFF” buttons to go live and disconnect from the stream.
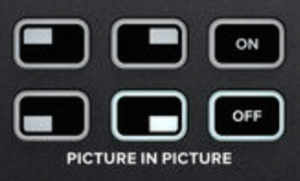
- PIP: Picture in picture superimposes a second source over your broadcast video source in a small box you can position and customize. Input 1 is the default picture in picture source, so if you’re broadcasting gameplay and want to superimpose your reactions, plug your camera into input 1 and it will appear in picture in picture.
 To enable picture in picture:
- Make sure your video to be inside the box is plugged into HDMI input 1.
- Plug your main video into HDMI input 2, 3, or 4.
- In the picture in picture buttons on control panel, press ‘on’.
You will now see the picture in picture box appear on the screen. To select a different position, press any of the position buttons.
Software Setup:
- ATEM Software Control: Install the ATEM Software Control on your computer. Ensure it is compatible with your operating system.
- Network Configuration: Make sure your computer and the ATEM Mini Pro are on the same network to enable remote control. Else you can cable your PC to the Atem Mini Pro using a USB-C Cable.
- Launch ATEM Software: Open the ATEM Software Control, and it should automatically detect the ATEM Mini Pro on the network.
Using the software will allow you to:
Livestream:
- Livestream to Youtube, Twitch and many other platforms.
- Streaming to Youtube
Graphics & Overlays:
- Import graphics and lower-thirds into the ATEM Software Control. You can use Photoshop or other graphics software to create these.
- Utilize the “DSK” (Downstream Key) in the ATEM Software Control to overlay graphics onto the program output.
- Youtube Graphics & overlays tutorial
Macros:
- Macros allow you to automate complex sequences of actions. Create and save macros for transitions, overlays, chroma key settings, or any other custom automation you need.
- Macros are incredibly useful for ensuring a polished and professional production.
- Youtube macros tutorial
Keying (Green Screen/Chroma Key):
- If you want to use a green screen for chroma key effects, make sure you have a well-lit green screen background behind your subject.
- Connect the camera capturing the subject to one of the ATEM Mini Pro’s inputs.
- In the ATEM Software Control, select the camera input and enable the Chroma Key function.
- Adjust the settings to key out the green background and replace it with the desired image or video source.
- Fine-tune the settings to ensure a clean chroma key effect. This may include adjusting the spill correction and edge color settings.
- Youtube keying tutorial
Experiment & Learn:
The ATEM Mini Pro offers a wide range of features and possibilities. Don’t hesitate to experiment with different settings, practice transitions, and explore its capabilities, including the creative use of green screen effects. Over time, you’ll become more proficient in creating professional live productions using the ATEM Mini Pro.
Remember, for more advanced features and troubleshooting, consult the user manual or explore online resources and forums. Enjoy your journey into live production with the ATEM Mini Pro!