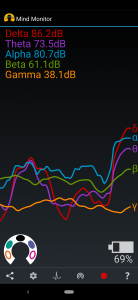
Muse S is a commercial brainwave scanner developed for meditation, sleeping etc. This tutorial will walk you through connecting Muse S to the Mind monitor app, so that you can recieve Brainwaves instead of raw EEG. The Mind monitor app processes the raw EEG into actual Brainwaves: Alpha, Beta, Delta, Theta and Gamma.
If you want to work with raw EEG or data from the other sensors (Gyroscope, accelerometer, heart rate) on Muse see our other Muse tutorial here.
Setting up the Muse 2 with Mind monitor
Before getting started you need to have the following items: PC mac or windows, Muse, Smartphone with MindMonitor app.
- Make sure that both Phone and PC are connected to the same Wifi. OSC only works on local network.
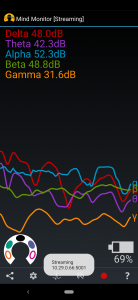
- Open the app and turn on the headset. They will automatically connect through Bluetooth. In the left lower corner you will be able to see the status of each sensor. Fully colored means good connection. It is important that you have a good connection on all sensors for the best results.
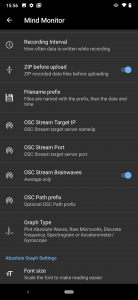
- Open setttings by pressing the “settings/gear” icon in the bottom menu.
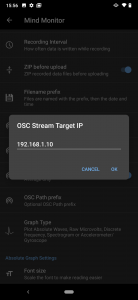
- Adjust the IP to your PC’s IP adress. If you dont know how to find your IP adresse see these guides, How to find your IP Mac How to find your IP on Windows.
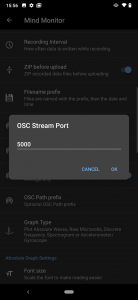
- Set the OSC Streaming port to match that of your reciever on your PC. (If you are using our example proccessing file this should be set to 5001) The OSC port is configurable and can be changed on both transmitter and reciever.
- Ensure in the settings that “OSC Stream Brainwaves” is set to “All Values”.
- Start the OSC stream by pressing the icon in the bottom menu.A small pop up will let you know, that you are now streaming OSC.

- Download Processing software to your computer and install. If you already have Processing installed you can skip this step.
- Open proccesing example from our GitHub on PC and run the example script. The script recieves, prints and sends data as OSC (see the output data in image below). It ignores values from sensors with a bad connection. The last line tells you which sensors have a good/true or bad/false connection.

- Now you can send the data to any software using OSC. Simply change the myRemoteLocation variable in the processing script to match the IP and OSC port of the reciever.
Suggestion
You can now connect your setup to software like Wekinator, which will enable you to process the data with machine learning. See tutorial on wekinator.
Further ressources